Skip to content

2025

Envoy Proxy vs NGINX:哪個適合你的架構?

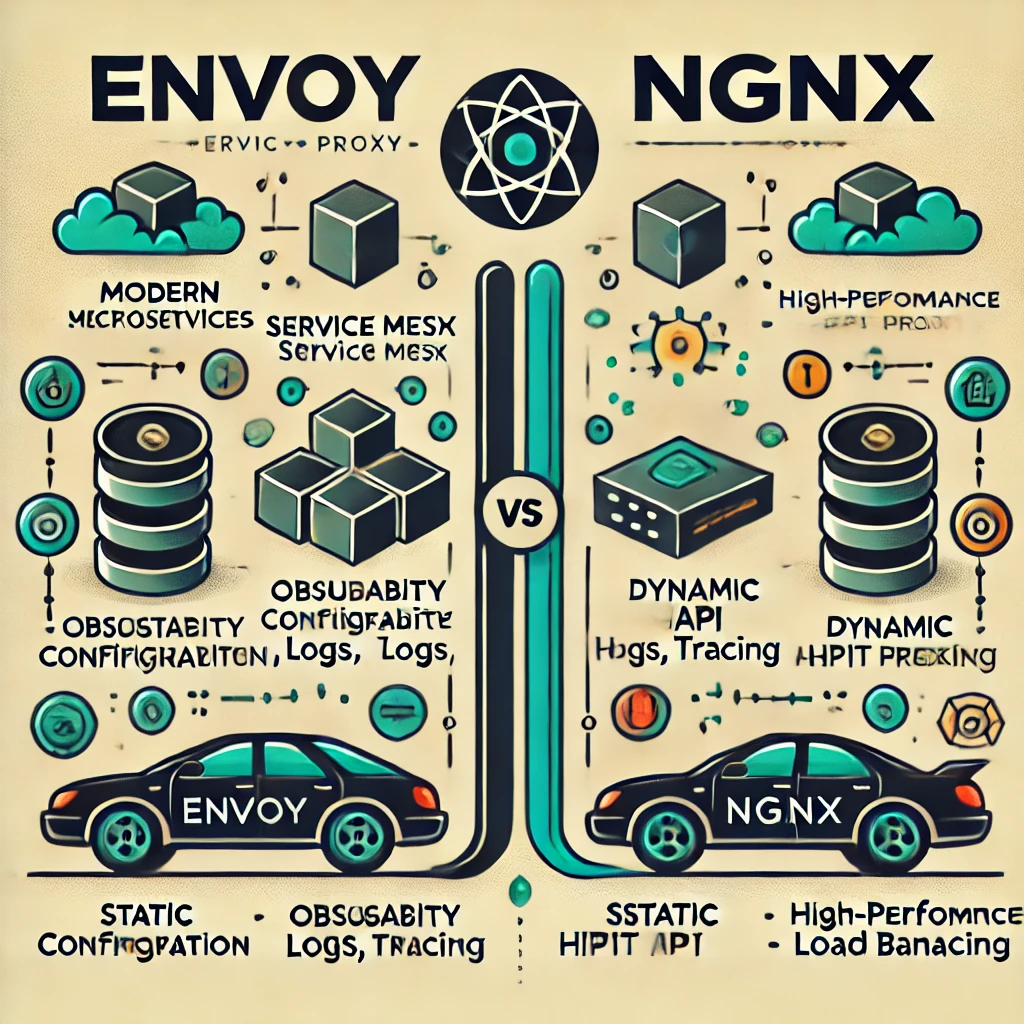
在現代雲原生應用和微服務架構中,選擇合適的代理(Proxy)對於效能、可擴展性和安全性至關重要。Envoy ProxyNGINX 是目前市場上最受歡迎的兩個選擇。儘管兩者都具備強大的功能,但它們適用於不同的場景並遵循不同的設計理念。本篇文章將探討它們的核心差異、優勢最佳使用案例

概述

NGINX

NGINX 最初是一款高效能的網頁伺服器,後來發展成為強大的反向代理和負載均衡器。由於其出色的HTTP 和 TCP 處理能力,它被廣泛應用於傳統和現代 Web 應用。

Envoy Proxy

Envoy 是由 Lyft 設計的現代化高效能代理,專為雲原生架構打造。它是IstioConsul服務網格(Service Mesh) 的關鍵組件,具備高可觀測性、動態配置與微服務環境的深度整合

架構與設計理念

特色 Envoy Proxy NGINX
設計理念 專為雲原生微服務架構打造 最初設計為網頁伺服器,後來發展為代理
配置管理 支援動態服務發現與 API(xDS) 依賴靜態配置,變更需重新載入
效能 針對分散式架構最佳化 高效能適用於傳統 Web 流量
可觀測性 內建監控指標、日誌與分佈式追蹤 基礎日誌與監控能力
擴展性 支援 gRPC API、過濾器與動態路由 Lua 腳本,動態能力有限

配置與管理

NGINX 配置

NGINX 主要依賴靜態配置文件nginx.conf),更改設定後需要重新載入才能生效。這對於傳統應用來說問題不大,但在動態微服務環境中可能帶來挑戰。

範例 NGINX 設定:

server {
    listen 80;
    location / {
        proxy_pass http://backend;
    }
}

Envoy 配置

Envoy 採用更具動態性的 API 配置,例如 xDS(Extensible Discovery Service),可即時更新設定,無需重新啟動代理。

範例 Envoy 設定:

static_resources:
  listeners:
    - name: listener_0
      address:
        socket_address:
          address: 0.0.0.0
          port_value: 10000
      filter_chains:
        - filters:
            - name: envoy.filters.network.http_connection_manager
              typed_config:
                "@type": type.googleapis.com/envoy.extensions.filters.network.http_connection_manager.v3.HttpConnectionManager
                stat_prefix: ingress_http
                route_config:
                  name: local_route
                  virtual_hosts:
                    - name: backend
                      domains: ["*"]
                      routes:
                        - match:
                            prefix: "/"
                          route:
                            cluster: service_backend

關鍵差異: - Envoy 支援即時動態更新,NGINX 則需手動修改配置並重新載入。 - Envoy 適用於服務網格(Service Mesh)架構,更適合微服務環境。

效能與可擴展性

  • NGINX 以其高吞吐量事件驅動架構著稱,適合用於靜態內容和傳統 Web 應用。
  • Envoy 針對服務間通訊(Service-to-Service Communication) 進行優化,支援 gRPC 和 HTTP/2,並提供內建可觀測性容錯機制
  • 延遲:NGINX 在處理靜態內容時表現稍優,而 Envoy 在動態路由與服務發現方面更具優勢。

可觀測性與監控

可觀測性(Observability)是選擇代理時的一個重要考量因素:

  • NGINX 具備基本的日誌與監控功能,但需額外整合第三方工具以獲得更深入的可觀測性。
  • Envoy 內建支援:
  • 監控指標(Prometheus、StatsD)
  • 分佈式追蹤(Zipkin、Jaeger、OpenTelemetry)
  • 結構化日誌

範例 Envoy 追蹤設定:

tracing:
  http:
    name: envoy.tracers.zipkin
    typed_config:
      "@type": type.googleapis.com/envoy.config.trace.v3.ZipkinConfig
      collector_cluster: zipkin
      collector_endpoint: "/api/v2/spans"

結論: 如果需要深度可觀測性,Envoy 會是更好的選擇。

安全性功能

特色 Envoy Proxy NGINX
mTLS(雙向 TLS) 原生支援 需額外配置
RBAC(角色存取控制) 支援 不支援
JWT 驗證 內建支援 需外掛
WAF(Web 應用防火牆) 無(需額外整合) NGINX Plus 提供

結論: Envoy 內建較強的安全性功能,而 NGINX Plus 提供企業級 WAF(需付費)。

適用場景

何時選擇 NGINX

✅ 需要高效能的 Web 伺服器來處理 HTTP/TCP 流量。

✅ 架構為單體式(Monolithic)傳統負載均衡模式

✅ 需求是輕量級靜態配置,並希望減少依賴。

何時選擇 Envoy Proxy

微服務服務網格(Service Mesh)架構。

✅ 需要動態服務發現、高級監控與追蹤功能

✅ 應用程式依賴 gRPC、HTTP/2 或 API Gateway 模式

結論

Envoy ProxyNGINX 各有所長,適用於不同的架構與需求。

  • NGINX傳統 Web 應用、負載均衡與反向代理的理想選擇。
  • Envoy Proxy雲原生、微服務環境與服務網格中表現出色。

最終選擇取決於你的應用需求。如果你的應用是高度可擴展的雲原生架構,Envoy 是更好的選擇。而對於傳統 Web 工作負載,NGINX 仍然佔據主導地位。

你的選擇是什麼?

你在架構中使用的是 Envoy 還是 NGINX?歡迎在評論區分享你的經驗!

The Power of Financial Freedom

Many of life’s challenges can be resolved with sufficient financial resources. If you have enough assets, quitting a job that no longer serves you should not be a concern. For colleagues you value, you can maintain those relationships outside the workplace. If you have a dream career, there’s no harm in proactively pursuing opportunities—sometimes, simply putting yourself forward is all it takes.

As parents age, their care becomes a pressing issue. If you have enough financial resources, many of these concerns become more manageable. Relying solely on personal effort to handle elder care is an immense challenge, but financial stability allows you to access professional services that ease the burden.

Inheritance disputes are another common source of family conflict. Despite being bound by blood, family members often become blinded by money, leading to heated arguments and broken relationships. Achieving financial freedom means you can stay above these conflicts. With proper financial planning—such as establishing a family trust or asset management company—you can not only protect your own wealth but also help your family minimize taxes and plan for future generations.

It is often said that 80% of life’s problems can be solved with money. This means that if you have financial stability, you can quickly resolve most material issues and focus your energy on the remaining 20%—the truly significant matters in life, such as personal growth, relationships, and happiness.

Unfortunately, many people mix up their priorities. They attempt to solve financial problems without financial resources, leading to unnecessary stress and struggle. The key is to understand what money can and cannot do, and use it strategically.

Becoming financially independent grants you control over your time and decisions. Once you achieve financial freedom, you realize what truly matters—people, experiences, and personal fulfillment. It also opens doors to new opportunities, as wealthy individuals tend to associate with others in similar circles, leading to valuable connections and further financial growth.

"80% of life’s problems can be solved with money. Therefore, the first priority in life should be to build wealth."

This does not mean that money is everything, but rather that financial security allows you to focus on the things that truly bring meaning to your life. The sooner you achieve financial stability, the sooner you can shift your attention to what really matters—health, relationships, and personal fulfillment.

Money should be a tool, not the ultimate goal. Strive to build financial stability so you can navigate life with greater ease. Once you have secured the means to solve everyday problems, you will have the freedom to focus on what truly brings you happiness and fulfillment.

財務自由的力量

許多生活中的挑戰,只要擁有足夠的財務資源,都能迎刃而解。如果你的資產充足,那麼辭去一份已經無法帶來價值的工作,就不會是一個困擾。至於那些珍視的同事關係,即使離開職場,你依然可以在生活中維持聯繫。如果你有夢想的職業,不妨主動尋找機會——有時候,只要勇敢踏出那一步,就能開啟新的可能。

隨著父母年齡增長,他們的照護問題變得日益迫切。如果你擁有足夠的財務資源,許多這類的擔憂就能得到妥善處理。單靠個人力量來照顧年邁的父母無疑是巨大挑戰,但財務穩定能讓你獲取專業的照護服務,減輕你的負擔。

遺產糾紛也是家庭矛盾的一大來源。即便是至親,面對金錢時,往往也會因為利益而產生爭執,甚至撕裂關係。然而,若你已經達到財務自由,就能超然於這些糾紛之外。透過適當的財務規劃,例如設立家族信託或資產管理公司,不僅能保障自身的財富,還能幫助家族有效減少稅務負擔,為未來世代做好準備。

人們常說:「80% 的人生問題都可以用金錢解決。」這意味著,如果你的財務穩定,大多數的物質問題都能迅速迎刃而解,你的精力便能專注於剩下的 20%——那些真正重要的事情,例如個人成長、人際關係與幸福感。

然而,許多人卻本末倒置,試圖在沒有足夠財務資源的情況下解決財務問題,結果讓自己陷入不必要的壓力與掙扎。關鍵在於理解金錢的價值與局限,並聰明地運用它。

達成財務獨立,意味著你能掌控自己的時間與決策。當你真正擁有財務自由時,會更清楚什麼才是人生的核心——人際關係、體驗,以及個人價值的實現。此外,財富自由還能為你開啟更多機會,因為富裕的人往往會與志同道合者互動,這樣的社交圈能帶來更具價值的連結,進一步促進財務成長。

"80% 的人生問題可以用金錢解決。因此,人生的首要目標應該是建立財富。"

這並不意味著金錢就是一切,而是財務安全能讓你將注意力轉向真正能為人生帶來意義的事物。越早達成財務穩定,就能越早專注於更重要的目標——健康、關係與個人成就。

金錢應該是工具,而非終極目標。努力建立財務穩定,讓你能夠更加從容地迎接人生挑戰。一旦你擁有解決日常問題的資源,就能擁有真正的自由,去追尋讓你快樂與滿足的事物。

Embracing Imperfection and Unlocking Effective Learning

Letting go of perfectionism is often the first step toward truly effective learning. Many of us grow up with the belief that we must be perfect to succeed, that anything less than perfection is unacceptable, and that imperfection equates to a lack of value. This mindset, while seemingly motivating, often leads to self-sabotage. We become afraid of failure, avoid challenges, and ultimately give up when things don’t go as planned. In my own journey, I realized that the more I tried to achieve perfection, the less confident I felt, even as I gained more knowledge. It was only when I shifted my focus from perfection to completion that I began to experience real progress.

The turning point came when I hit rock bottom. Overwhelmed by challenges, I realized that clinging to perfectionism was no longer sustainable. I decided to embrace completionism instead. This meant accepting my limits and working within them, acknowledging what I didn’t know and committing to steady improvement, and focusing on making progress rather than chasing arbitrary ideals. By adopting this mindset, I regained the confidence to learn and grow without fear of failure.

Making mistakes became an essential part of this new approach. Instead of avoiding errors, I began to see them as opportunities to identify blind spots and refine my understanding. The more mistakes I made and corrected, the deeper my grasp of concepts became. I also changed the way I studied. Passive methods, like rereading materials, were replaced with active recall, where I attempted to retrieve information from memory before verifying it. This not only strengthened my neural connections but also prepared me to apply my knowledge in real-world scenarios.

I realized the importance of optimizing my study environment as well. Distractions like smartphones, even when turned face down, can significantly impact focus. Keeping my workspace analog—with notebooks and clocks instead of digital devices—helped me stay in the zone. Visual aids also became an invaluable tool. Before diving into dense text, I used diagrams, illustrations, and videos to create mental anchors, which made it easier to remember and connect ideas later.

Another shift was testing myself early and often, even before mastering a topic. Tackling practice questions upfront allowed me to build hypotheses and identify areas for improvement, creating a solid foundation for learning. I also prioritized consistency over duration. Setting a specific time for learning each day, even if only for 15 minutes, helped me develop habits that maintained momentum over time.

The most profound change, however, was redefining success. Instead of equating success with flawless execution, I began to see it as steady growth and progress. Mistakes were no longer failures but stepping stones to improvement. Learning became an adventure rather than a race, and I found myself enjoying the process more than ever before. Reflecting on my experiences, I now understand that true learning begins not when you aim for perfection but when you embrace imperfection and focus on completing tasks, learning from them, and moving forward.

Learning is a universal key to solving life’s challenges, whether in career advancement, personal development, or self-fulfillment. By shedding perfectionism and embracing completionism, we not only achieve more but also rediscover the joy of learning. As the philosopher John Dewey once said, “We do not learn from experience... we learn from reflecting on experience.” Take a step today, make a mistake, learn from it, and celebrate the journey. Progress, after all, is the real perfection.

擁抱不完美,解鎖高效學習

放下完美主義往往是邁向真正高效學習的第一步。我們許多人從小就被灌輸一種觀念,認為只有達到完美才能成功,任何低於完美的表現都是不可接受的,不完美就等於沒有價值。然而,這種心態雖然看似能激勵人前進,卻往往導致自我挫敗。我們害怕失敗,避免挑戰,甚至在事情不如預期時選擇放棄。在我的學習旅程中,我發現,當我越追求完美時,儘管學到了更多知識,內心卻越來越缺乏自信。直到我將焦點從完美轉向完成,才開始真正感受到進步。

改變的契機來自於一次低谷期。當我被各種挑戰壓得喘不過氣時,我意識到堅持完美主義已經變得不可持續。我決定轉而接受「完成主義」——這意味著承認自己的極限並在其中努力,接受自己尚未掌握的知識並承諾持續改進,把重心放在不斷前進,而非追逐遙不可及的標準。這種心態的轉變讓我重新找回了學習和成長的信心,不再害怕失敗。

犯錯成為這種新學習方式中不可或缺的一環。我不再迴避錯誤,而是將其視為發現盲點和深化理解的機會。錯得越多,修正的次數越多,對概念的掌握就越深入。我也改變了學習方法,捨棄被動學習(如重讀教材),轉而採用主動回憶法——先嘗試從記憶中提取資訊,再去驗證答案。這不僅強化了神經連結,也幫助我在實際應用時更靈活地運用知識。

我還發現,優化學習環境至關重要。即使是面朝下放置的智慧型手機,也會嚴重影響專注力。我選擇讓學習空間保持類比化——使用筆記本和時鐘,而非數位設備,使自己更容易進入專注狀態。此外,視覺輔助工具成為我學習的重要幫手。在閱讀艱澀文本之前,我會先透過圖表、插圖或影片建立心理錨點,這樣在後續記憶與理解時更容易串聯起來。

另一個關鍵變化是提早並頻繁測試自己,即使尚未完全掌握某個主題。我會先做練習題,透過這個過程建立假設並找出需要加強的部分,為後續學習奠定更穩固的基礎。同時,我開始優先考慮「學習的穩定性」而非「學習時長」。每天固定安排一小段時間學習,即使只有15分鐘,也能透過日積月累形成習慣,保持學習動力。

但最深遠的改變,是我對成功的重新定義。我不再將成功等同於「完美無缺」,而是視其為持續成長與進步。錯誤不再是失敗,而是通往提升的墊腳石。學習變成了一場冒險,而非一場競賽,我開始真正享受這個過程。回顧這些經歷,我深刻理解到:真正的學習,並非來自對完美的追求,而是來自擁抱不完美,專注於完成每個任務,從中學習,並不斷向前邁進。

學習是解決人生各種挑戰的關鍵,無論是在職涯發展、個人成長,還是自我實現的旅程中。當我們拋棄完美主義,擁抱完成主義,不僅能取得更好的成果,還能重新找回學習的樂趣。正如哲學家約翰·杜威(John Dewey)所說:「我們並非從經驗中學習,而是從對經驗的反思中學習。」今天就邁出一步,犯一個錯誤,從中學習,並為這趟旅程感到欣喜。因為,真正的完美,來自於不斷進步的過程。

Coalesced Memory Access in CUDA for High-Performance Computing

When developing CUDA applications, efficient memory usage is crucial to unlocking the full potential of your GPU. Among the many optimization strategies, coalesced memory access plays a central role in achieving high performance by minimizing memory latency and maximizing bandwidth utilization. This article will explore the concept, its significance, and practical steps to implement it.

What Is Coalesced Memory Access?

In CUDA, global memory is relatively slow compared to other types of memory like shared memory. When a warp (32 threads) accesses global memory, the GPU tries to fetch data in a single memory transaction. For this to happen efficiently, memory accesses by all threads in the warp must be coalesced—meaning they access consecutive memory addresses. If threads access memory in a non-coalesced pattern, the GPU splits the transaction into multiple smaller transactions, significantly increasing memory latency.

Why Does Coalescing Matter?

The difference between coalesced and uncoalesced memory access can be dramatic. For example, a kernel where threads access memory in a coalesced pattern might execute twice as fast as one with uncoalesced access. This is evident in the performance comparison of two modes in a simple CUDA kernel, as shown below:

  • Coalesced Access: 232 microseconds
  • Uncoalesced Access: 540 microseconds

The uncoalesced access is more than twice as slow, underscoring the need for proper memory alignment.

Techniques for Coalesced Access

To write CUDA kernels with coalesced memory access patterns, consider the following:

1. Align Threads with Memory Layout

Ensure that thread IDs correspond directly to memory addresses. For instance, thread i should access the i-th element in an array.

python @cuda.jit def coalesced_access(a, b, out): i = cuda.grid(1) out[i] = a[i] + b[i] # Coalesced

2. Use Shared Memory

Shared memory acts as a user-controlled cache that resides on-chip and is shared among threads in a block. Using shared memory enables coalesced reads and writes, even for irregular memory access patterns.

python @cuda.jit def shared_memory_example(a, out): tile = cuda.shared.array((32, 32), dtype=numba.types.float32) i, j = cuda.grid(2) tile[cuda.threadIdx.y, cuda.threadIdx.x] = a[i, j] # Coalesced read cuda.syncthreads() out[j, i] = tile[cuda.threadIdx.x, cuda.threadIdx.y] # Coalesced write

3. Optimize 2D and 3D Grids

When working with multi-dimensional data, configure grids and blocks to ensure thread alignment with memory layout.

Shared Memory and Bank Conflicts

While shared memory offers significant performance gains, improper usage can lead to bank conflicts. CUDA organizes shared memory into banks, and if two or more threads in a warp access the same bank, accesses are serialized, degrading performance. A simple solution is to add padding to avoid threads accessing the same bank.

tile = cuda.shared.array((32, 33), dtype=numba.types.float32)  # Add padding

This padding ensures that consecutive threads access different memory banks, eliminating conflicts.

Case Study: Matrix Transpose Optimization

Consider a matrix transpose operation where coalesced reads and writes can drastically improve performance. Below is a comparison of different approaches:

  1. Naive Kernel: Coalesced reads but uncoalesced writes.
  2. Shared Memory Kernel: Coalesced reads and writes using shared memory.
  3. Optimized Kernel: Shared memory with bank conflict resolution.

Performance gains: - Naive Kernel: 1.61 ms - Shared Memory Kernel: 1.1 ms - Optimized Kernel: 0.79 ms

Key Takeaways

  • Coalesced memory access minimizes latency and maximizes bandwidth, making it an essential optimization in CUDA programming.
  • Shared memory is a powerful tool to facilitate coalesced patterns, but care must be taken to avoid bank conflicts.
  • Optimizing memory access patterns often yields significant performance improvements with minimal code changes.

By mastering coalesced memory access and shared memory, you can write high-performance CUDA kernels that make the most of your GPU's computational power. As always, remember to profile your code to identify bottlenecks and verify optimizations.

CUDA 中的合併記憶體存取以實現高效能運算

在開發 CUDA 應用程式時,有效的記憶體使用 對於發揮 GPU 的全部潛力至關重要。在眾多最佳化策略中,合併記憶體存取(Coalesced Memory Access) 在降低記憶體延遲與最大化頻寬使用率方面扮演關鍵角色。本文將探討此概念的核心原理、其重要性,以及如何在 CUDA 程式中實作。

什麼是合併記憶體存取?

在 CUDA 中,全域記憶體(Global Memory) 相較於 共享記憶體(Shared Memory) 來說速度較慢。當一個 warp(32 個執行緒) 存取全域記憶體時,GPU 會嘗試以單一記憶體交易(memory transaction)讀取或寫入資料。若要高效執行,所有執行緒的記憶體存取應該是合併的,也就是存取連續的記憶體位址。如果存取模式是非合併的,GPU 會將該操作拆分為多個較小的交易,進而顯著增加記憶體延遲。

為何合併記憶體存取很重要?

合併與非合併記憶體存取的效能差異可能極為顯著。例如,當執行緒按照合併模式存取記憶體時,CUDA 核心(Kernel)的執行速度可能是非合併存取模式的 兩倍以上。以下是一個簡單的 CUDA 核心的效能比較:

  • 合併存取:232 微秒
  • 非合併存取:540 微秒

非合併存取速度幾乎是合併存取的 2.3 倍,這凸顯了適當對齊記憶體存取模式的必要性。

合併記憶體存取的技巧

為了在 CUDA 核心中實作合併記憶體存取模式,可以考慮以下策略:

1. 對齊執行緒與記憶體布局

確保執行緒索引(thread ID)對應到記憶體中的連續位置。例如,執行緒 i 應該存取陣列的第 i 個元素:

@cuda.jit
def coalesced_access(a, b, out):
    i = cuda.grid(1)
    out[i] = a[i] + b[i]  # 合併存取

2. 使用共享記憶體(Shared Memory)

共享記憶體是一種快取,位於 GPU 晶片上,由區塊內的執行緒共享。透過共享記憶體,我們可以在不規則的存取模式下實現合併存取:

@cuda.jit
def shared_memory_example(a, out):
    tile = cuda.shared.array((32, 32), dtype=numba.types.float32)
    i, j = cuda.grid(2)
    tile[cuda.threadIdx.y, cuda.threadIdx.x] = a[i, j]  # 合併讀取
    cuda.syncthreads()
    out[j, i] = tile[cuda.threadIdx.x, cuda.threadIdx.y]  # 合併寫入

3. 最佳化 2D 和 3D 格狀結構

當處理 二維(2D)或三維(3D)資料 時,應當合理設計 CUDA 的網格(Grid)區塊(Block),確保執行緒與記憶體布局對齊,以減少非合併存取的發生。

共享記憶體與 Bank Conflict(記憶體銀行衝突)

儘管共享記憶體能夠帶來顯著的效能提升,但不當的使用方式可能導致記憶體銀行衝突(Bank Conflict)。CUDA 的共享記憶體由多個記憶體銀行組成,若同一個 warp 中的多個執行緒同時存取相同的記憶體銀行,這些存取將會序列化,導致效能下降。

解決方案:增加記憶體填充(Padding),確保每個執行緒存取不同的記憶體銀行。例如:

tile = cuda.shared.array((32, 33), dtype=numba.types.float32)  # 增加填充

這樣做可以確保連續的執行緒存取不同的記憶體銀行,避免衝突。

案例研究:矩陣轉置(Matrix Transpose)最佳化

考慮矩陣轉置(Matrix Transpose)這一運算,若使用合併讀寫模式,效能將顯著提升。以下是不同方法的效能比較:

  1. 天真方法(Naive Kernel):合併讀取,但寫入不合併。
  2. 共享記憶體方法(Shared Memory Kernel):透過共享記憶體實現合併讀取與寫入。
  3. 最佳化方法(Optimized Kernel):使用共享記憶體並解決記憶體銀行衝突。

效能比較: - 天真方法:1.61 毫秒 - 共享記憶體方法:1.1 毫秒 - 最佳化方法:0.79 毫秒

重要結論

  • 合併記憶體存取 可以降低延遲、提高頻寬利用率,是 CUDA 最佳化的重要技術。
  • 共享記憶體 可幫助實現合併存取,但需注意 記憶體銀行衝突
  • 優化記憶體存取模式 往往只需少量代碼更改,但可獲得 顯著效能提升

透過掌握合併記憶體存取與共享記憶體技術,你可以撰寫高效能的 CUDA 核心,最大化 GPU 的運算能力。此外,別忘了使用 CUDA Profiler 來分析效能瓶頸,驗證你的最佳化策略!

Accelerating Data Processing with Grid Stride Loops in CUDA

As the demand for processing large datasets increases, achieving high performance becomes critical. GPUs excel at parallel computation, and CUDA provides developers with the tools to leverage this power. One essential technique for efficiently working with large datasets in CUDA is the grid stride loop.

What Are Grid Stride Loops?

Grid stride loops are a design pattern that extends the functionality of CUDA kernels to process large datasets efficiently. In contrast to simple kernels where each thread processes only one element, grid stride loops enable threads to iterate over multiple elements in a dataset. This allows for better utilization of the GPU's parallel processing capabilities while simplifying the handling of datasets that exceed the thread count.

How Grid Stride Loops Work

In CUDA, threads are grouped into blocks, which in turn form a grid. Each thread in the grid has a unique index (idx), which determines the portion of the dataset it processes. However, in scenarios where the dataset size exceeds the total number of threads in the grid, grid stride loops step in.

A grid stride loop ensures that each thread processes elements at regular intervals, defined by the grid stride:

  1. Thread Index: Each thread starts with an index (idx = cuda.grid(1)).
  2. Grid Stride: The stride is the total number of threads in the grid (stride = cuda.gridsize(1)).
  3. Looping: Threads iterate over the dataset, processing every strideth element.

Here's a simple example of a grid stride loop in a CUDA kernel:

from numba import cuda

@cuda.jit
def add_kernel(x, y, out):
    idx = cuda.grid(1)
    stride = cuda.gridsize(1)

    for i in range(idx, x.size, stride):
        out[i] = x[i] + y[i]

Benefits of Grid Stride Loops

  1. Flexibility: Grid stride loops adapt to any dataset size without requiring specific grid or block configurations.
  2. Memory Coalescing: By processing consecutive elements in memory, threads improve memory access efficiency.
  3. Scalability: They allow kernels to utilize all available GPU resources effectively, even for very large datasets.

A Practical Example: Hypotenuse Calculation

Consider calculating the hypotenuse for pairs of numbers stored in arrays. Using a grid stride loop, the kernel can process arrays of arbitrary size:

from numba import cuda
from math import hypot
import numpy as np

@cuda.jit
def hypot_stride(a, b, c):
    idx = cuda.grid(1)
    stride = cuda.gridsize(1)

    for i in range(idx, a.size, stride):
        c[i] = hypot(a[i], b[i])

# Initialize data
n = 1000000
a = np.random.uniform(-10, 10, n).astype(np.float32)
b = np.random.uniform(-10, 10, n).astype(np.float32)
c = np.zeros_like(a)

# Transfer to GPU
d_a = cuda.to_device(a)
d_b = cuda.to_device(b)
d_c = cuda.device_array_like(c)

# Kernel launch
threads_per_block = 128
blocks_per_grid = (n + threads_per_block - 1) // threads_per_block
hypot_stride[blocks_per_grid, threads_per_block](d_a, d_b, d_c)

# Retrieve results
result = d_c.copy_to_host()

This approach ensures that all elements in the arrays are processed efficiently, regardless of their size.

Conclusion

Grid stride loops are a cornerstone of efficient CUDA programming, enabling developers to handle datasets that exceed the capacity of a single grid. By combining grid stride loops with techniques like memory coalescing and atomic operations, you can harness the full power of the GPU for high-performance data processing.

Whether you're working on numerical simulations, image processing, or scientific computing, grid stride loops provide a scalable and elegant solution to parallelize your computations on the GPU.

利用 CUDA 的 Grid Stride Loops 加速數據處理

隨著對處理大型數據集的需求不斷增長,高效能計算變得至關重要。GPU 在並行計算方面表現卓越,而 CUDA 為開發者提供了強大的工具來利用這種能力。在 CUDA 中,一種高效處理大型數據集的重要技術就是 Grid Stride Loop

什麼是 Grid Stride Loop?

Grid Stride Loop 是一種設計模式,擴展了 CUDA kernel 的功能,使其能夠高效地處理大型數據集。與簡單的 kernel(每個執行緒僅處理一個元素)不同,Grid Stride Loop 允許執行緒遍歷多個數據元素,從而更充分地利用 GPU 的並行計算能力,並且能夠簡化超過執行緒數量的數據集的處理方式。

Grid Stride Loop 的運作方式

在 CUDA 中,執行緒(Thread)被組織成區塊(Block),區塊則組成網格(Grid)。每個執行緒在網格中的索引 (idx) 決定了它所處理的數據範圍。然而,當數據集的大小超過網格內所有執行緒的總數時,Grid Stride Loop 就能發揮作用。

Grid Stride Loop 透過 Grid Stride(網格步長) 來確保每個執行緒間隔性地處理數據:

  1. 執行緒索引:每個執行緒從索引開始 (idx = cuda.grid(1))。
  2. 網格步長:步長等於整個網格中的執行緒總數 (stride = cuda.gridsize(1))。
  3. 迴圈遍歷:執行緒依據步長遍歷數據集,每次處理 stride 間隔的元素。

以下是一個在 CUDA kernel 中使用 Grid Stride Loop 的簡單範例:

from numba import cuda

@cuda.jit
def add_kernel(x, y, out):
    idx = cuda.grid(1)
    stride = cuda.gridsize(1)

    for i in range(idx, x.size, stride):
        out[i] = x[i] + y[i]

Grid Stride Loop 的優勢

  1. 靈活性:Grid Stride Loop 可適應任何大小的數據集,無需為特定的 Grid 或 Block 設定調整配置。
  2. 記憶體共用(Memory Coalescing):透過處理連續的數據元素,提升記憶體存取效率。
  3. 可擴展性:即使是超大型數據集,Grid Stride Loop 仍可充分利用 GPU 的計算資源。

實際案例:計算直角三角形斜邊長度(Hypotenuse)

假設我們要計算一組數值對應的直角三角形斜邊長度,可以利用 Grid Stride Loop 高效處理任意大小的數組:

from numba import cuda
from math import hypot
import numpy as np

@cuda.jit
def hypot_stride(a, b, c):
    idx = cuda.grid(1)
    stride = cuda.gridsize(1)

    for i in range(idx, a.size, stride):
        c[i] = hypot(a[i], b[i])

# 初始化數據
n = 1000000
a = np.random.uniform(-10, 10, n).astype(np.float32)
b = np.random.uniform(-10, 10, n).astype(np.float32)
c = np.zeros_like(a)

# 傳輸數據至 GPU
d_a = cuda.to_device(a)
d_b = cuda.to_device(b)
d_c = cuda.device_array_like(c)

# 啟動 Kernel
threads_per_block = 128
blocks_per_grid = (n + threads_per_block - 1) // threads_per_block
hypot_stride[blocks_per_grid, threads_per_block](d_a, d_b, d_c)

# 取回結果
result = d_c.copy_to_host()

這種方法確保了數組中的所有元素都能夠高效處理,無論數據集的大小如何變化。

結論

Grid Stride Loop 是高效 CUDA 程式設計的重要技術之一,允許開發者處理超過單一 Grid 容量的數據集。結合記憶體共用(Memory Coalescing)、原子操作(Atomic Operations)等技術,Grid Stride Loop 能夠充分發揮 GPU 的強大並行運算能力。

無論是數值模擬、影像處理還是科學計算,Grid Stride Loop 都提供了一種可擴展且優雅的解決方案,使你的 GPU 計算更高效、更強大。

Accelerating Python with Numba - Introduction to GPU Programming

Python has established itself as a favorite among developers due to its simplicity and robust libraries for scientific computing. However, computationally intensive tasks often challenge Python's performance. Enter Numba — a just-in-time compiler designed to turbocharge numerically focused Python code on CPUs and GPUs.

In this post, we'll explore how Numba simplifies GPU programming using NVIDIA's CUDA platform, making it accessible even for developers with minimal experience in C/C++.

What is Numba?

Numba is a just-in-time (JIT), type-specializing, function compiler that converts Python functions into optimized machine code. Whether you're targeting CPUs or NVIDIA GPUs, Numba provides significant performance boosts with minimal code changes.

Here's a breakdown of Numba's key features: - Function Compiler: Optimizes individual functions rather than entire programs. - Type-Specializing: Generates efficient implementations based on specific argument types. - Just-in-Time: Compiles functions when they are called, ensuring compatibility with dynamic Python types. - Numerically-Focused: Specializes in int, float, and complex data types.

Why GPU Programming?

GPUs are designed for massive parallelism, enabling thousands of threads to execute simultaneously. This makes them ideal for data-parallel tasks like matrix computations, simulations, and image processing. CUDA, NVIDIA's parallel computing platform, unlocks this potential, and Numba provides a Pythonic interface for leveraging CUDA without the steep learning curve of writing C/C++ code.

Getting Started with Numba

CPU Optimization

Before diving into GPUs, let's look at how Numba accelerates Python functions on the CPU. By applying the @jit decorator, Numba optimizes the following hypotenuse calculation function:

from numba import jit
import math

@jit
def hypot(x, y):
    return math.sqrt(x**2 + y**2)

Once decorated, the function is compiled into machine code the first time it's called, offering a noticeable speedup.

GPU Acceleration

Numba simplifies GPU programming with its support for CUDA. You can GPU-accelerate NumPy Universal Functions (ufuncs), which are naturally data-parallel. For example, a scalar addition operation can be vectorized for the GPU using the @vectorize decorator:

from numba import vectorize
import numpy as np

@vectorize(['int64(int64, int64)'], target='cuda')
def add(x, y):
    return x + y

a = np.array([1, 2, 3])
b = np.array([4, 5, 6])
print(add(a, b))  # Output: [5, 7, 9]

This single function call triggers a sequence of GPU operations, including memory allocation, data transfer, and kernel execution.

Advanced Features of Numba

Custom CUDA Kernels

For tasks that go beyond element-wise operations, Numba allows you to write custom CUDA kernels using the @cuda.jit decorator. These kernels provide fine-grained control over thread behavior and enable optimization for complex algorithms.

Shared Memory and Multidimensional Grids

In more advanced use cases, Numba supports 2D and 3D data structures and shared memory, enabling developers to craft high-performance GPU code tailored to specific applications.

Comparing CUDA Programming Options

Numba is not the only Python library for GPU programming. Here's how it compares to alternatives:

Framework Pros Cons
CUDA C/C++ High performance, full CUDA API Requires C/C++ expertise
pyCUDA Full CUDA API for Python Extensive code modifications needed
Numba Minimal code changes, Pythonic syntax Slightly less performant than pyCUDA

Practical Considerations for GPU Programming

While GPUs can provide massive speedups, misuse can lead to underwhelming results. Here are some best practices: - Use large datasets: GPUs excel with high data parallelism. - Maximize arithmetic intensity: Ensure sufficient computation relative to memory operations. - Optimize memory transfers: Minimize data movement between the CPU and GPU.

Conclusion

Numba bridges the gap between Python's simplicity and the raw power of GPUs, democratizing access to high-performance computing. Whether you're a data scientist, researcher, or developer, Numba offers a practical and efficient way to supercharge Python applications.

Ready to dive deeper? Explore the full potential of GPU programming with Numba and CUDA to transform your computational workloads.