
How to Install Ubuntu on an External Drive Using macOS
If you’re using Mac hardware but also want to run Ubuntu, you can install Ubuntu on an external hard drive without risking the removal of your macOS installation. Here’s how to do it without messing up your bootloader:
-
Plug in your external SSD/HDD. Open Disk Utility and format it to MS-DOS (FAT).
-
Open a Terminal window and run:
diskutil list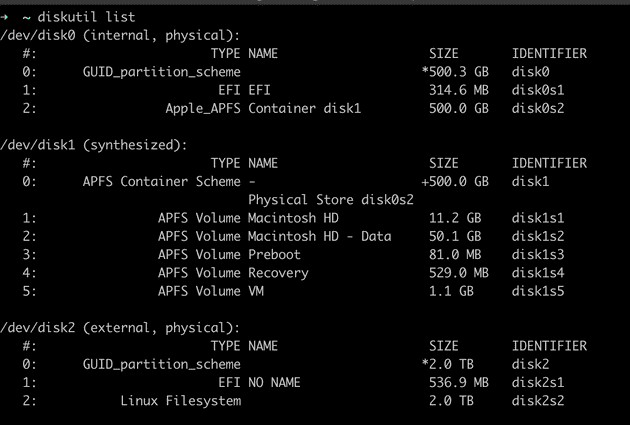
This will help you find your external hard drive’s IDENTIFIER, e.g., disk2 in this example.
-
Download and install VirtualBox: VirtualBox Website
-
Run the two commands below and start VirtualBox with admin rights:
sudo VBoxManage internalcommands createrawvmdk -filename bootcamp.vmdk -rawdisk /dev/disk2 sudo /Applications/VirtualBox.app/Contents/MacOS/VirtualBox -
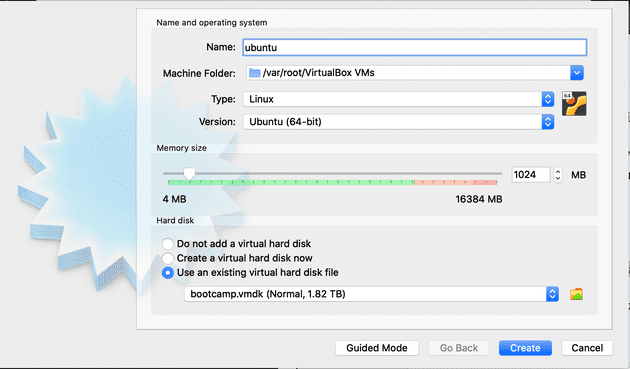
Select “New” and then click on “Expert Mode.” Choose “Use an existing virtual hard disk file.”
-
In the “System” tab, check the box for “Enable EFI (special OSes only).”
-
In the “Storage” tab, mount the Ubuntu ISO file to the virtual machine. You can download the Ubuntu ISO file from here.
-
Start the virtual machine and proceed with the Ubuntu installation.
-
Once the installation is complete, you’ll be ready to boot from the drive. For Mac, you’ll also need to reduce the Security level and allow booting from external media. To do this, press and hold Command-R immediately after you see the Apple logo to start macOS recovery.
-
Restart your Mac again and press the Option key. You can now choose your drive with the EFI label.
Enjoy using Ubuntu on Apple hardware! Note that you might have to sort out some driver issues, but hopefully, this guide makes the process easier for you.