Upgrade AppMon from Version 6.5 to 7.1
I am working on upgrading Dynatrace AppMon from version 6.5 to 7.1. AppMon is a performance data gathering tool trusted by many clients; it assists developers in troubleshooting issues within applications. This version upgrade includes new features and a new UI dashboard. Below are the steps to guide you through the process:
First, it’s important to consult the system requirements for hardware and the operating system. System Requirements April 2018. For example, if you’re running a legacy Java Virtual Machine (JVM), the help desk may not be able to assist you with issues. Make sure you have a 64-bit client and sufficient disk space.
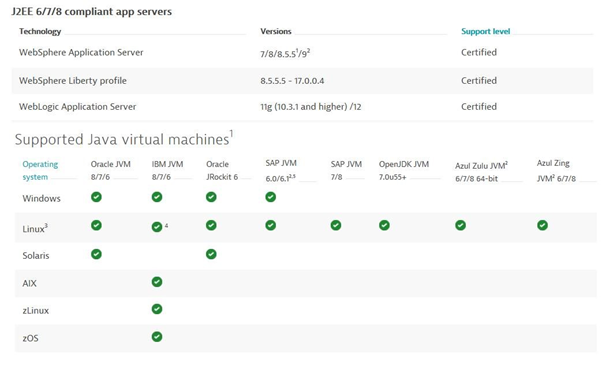
Additionally, move the session storage location out of the installation directory before starting. It’s recommended to back up both the session storage and configuration data. Be sure to consult the component compatibility matrix Component Compatibility beforehand.
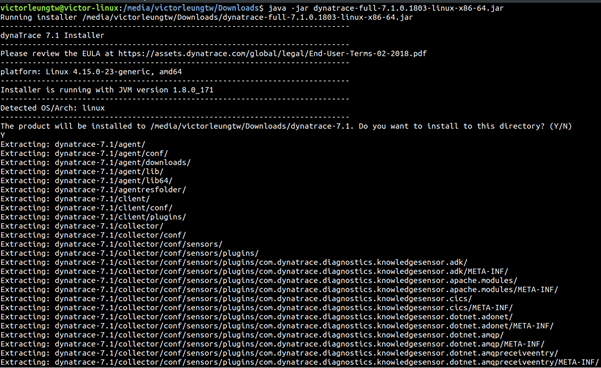
Second, install the new AppMon 7.1 version. For Linux, run the command:
java -jar dynatrace-full-7.1.0.1803-linux-x86–64.jar
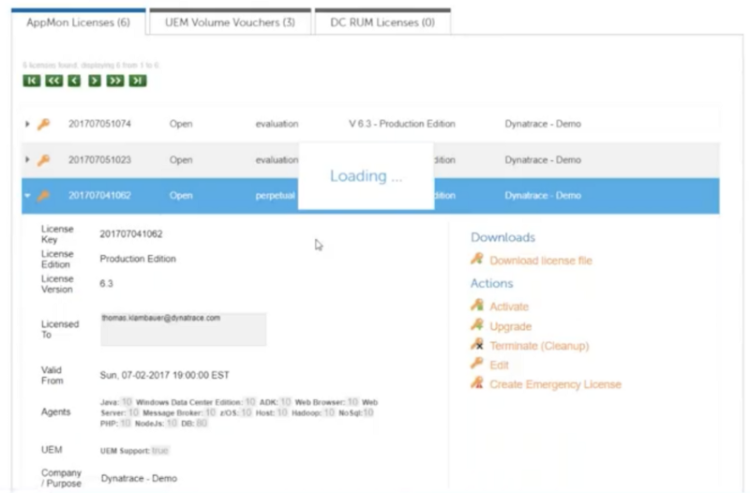
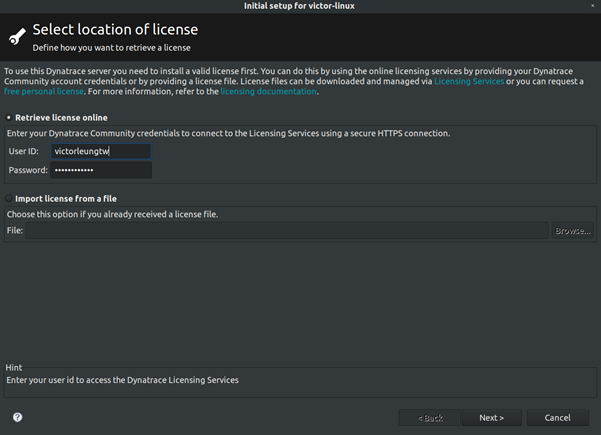
Then deactivate and upgrade the licenses. This will place your server into a grace period before shutting it down.
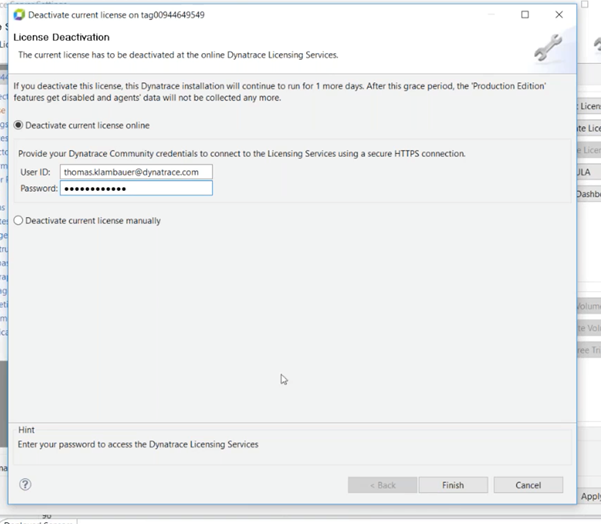
Click on the “Upgrade” button for the license.
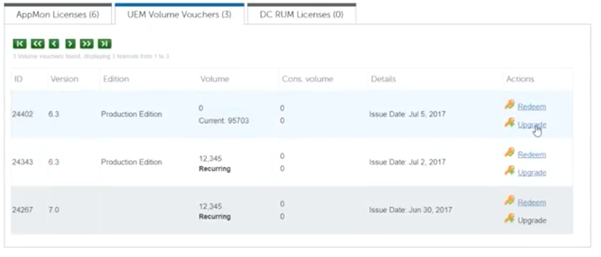
And for the vouchers as well:
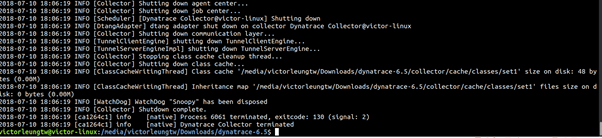
Third, shut down the old version 6.5 collector, server, and front-end server. This would be an ideal time to create backups, including those for the Performance Warehouse DB and Session Store.


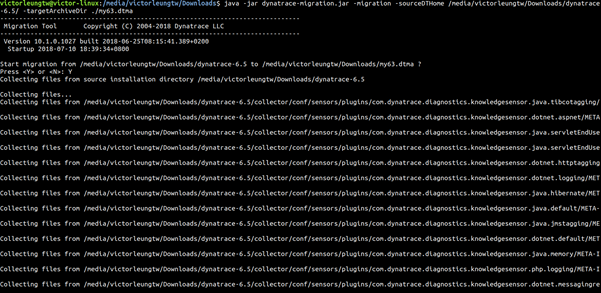
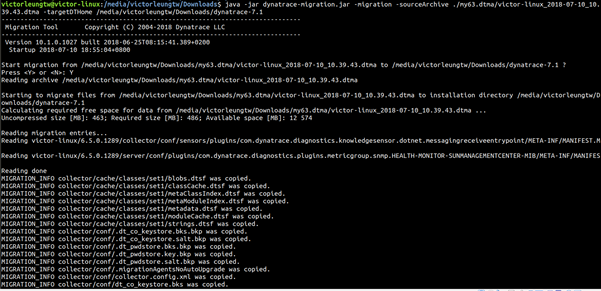
Fourth, use the migration tool that can be downloaded from here.
Run the command:
java -jar dynatrace-migration.jar -migration -sourceDTHome "<DT_HOME_OLD>" -targetArchiveDir "<ARCHIVE_DIR>"
Here, DT_HOME_OLD is the old AppMon installation path and ARCHIVE_DIR is the backup directory. Note that on a Windows machine, administrator rights are needed to perform this step.
Next, move the backup files to the new 7.1 installation using the command:
java -jar dynatrace-migration.jar -migration -sourceArchive "<ARCHIVE_DIR>/<MIGRATION_ARCHIVE>" -targetDTHome "<DT_HOME_NEW>"
Where ARCHIVE_DIR/MIGRATION_ARCHIVE is the location of the ./dtma file and DT_HOME_NEW is the path for the new Dynatrace 7.1 installation.
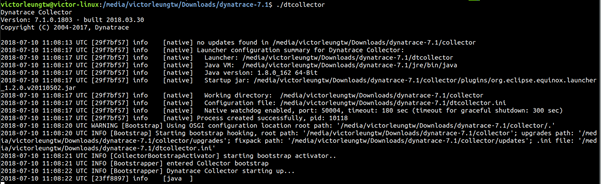
Then register and auto-start any additional collector instances.
Fifth, start the new components like the collector and the front-end server.
The client migration step can usually be skipped, and you can activate licenses for the new servers:
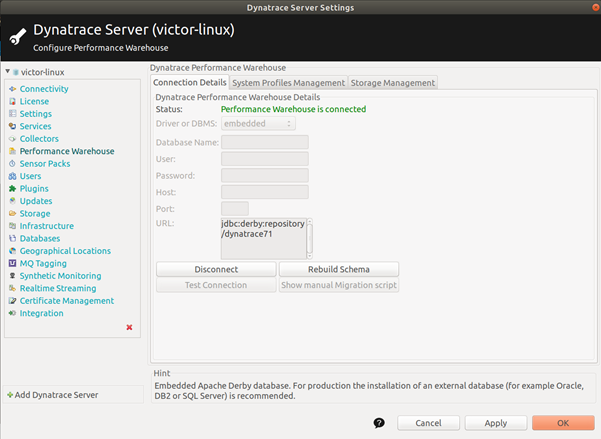
Finally, double-check the settings on the server to ensure that the Performance Warehouse and session storage have been migrated and connected.
It’s also recommended to restart and update the agent. Last but not least, check and validate that everything is working as expected.
Please let me know if you have any questions.